Monday, May 12, 2008
Thursday, May 1, 2008


Tuesday, April 29, 2008
References
1. "Do The Rot Thing: A Teacher's Guide To Compost Activities"
Alameda County Waste Management Authority & Alameda County Source Reduction and
Recycling Board
777 David Street
CA 94577
Website: www. stopwaste.org
2. Florida Backyard Composting Tutorial and Information Website
Sarasota County Government
Website: www. compostinfo.com
3. Papers present by:
a. Ms Sonia Mendoza at the Second GAIA Global Meeting 2003
17 - 21 March, 2003, Penang, Malaysia
b. Mother Earth Unlimited, Philippines
38 Highland Drive, Blue Ridge, Quezon City,
Philippines
4. Centre For Environment, Technology And Development malaysia (CETDEM)
P. O. Box 382, 46740 Petaling Jaya
Kuala Lumpur
Malaysia
Website: www.cetdem.org.my
Troubleshooting
Compost piles using only biodegradable plant material usually do not stink or attract vermin. However, biodegradable material consisting of food scraps may pose a problem if not handled correctly.
Problem 1:
Compost pile stinks and attract flies
Cause:
1. Food scraps are exposed.
2. Too wet or too much food scraps in pile.
Solution:
1. Cover food scraps with soil or bury and mix it into the pile.
2. Add more soil or browns and turn pile.
Problem 2:
Pile infested with eodents and vermins
Cause:
Exposed food scraps or holes largwer than 1/4 inch.
Solution:
1. Cover the exposed food scraps.
2. Use rodent proof bins or containers or traps and baits.
Problem 3:
Compost process is slow or not composting.
Cause:
1. Too dry
2. Too much browns
Solution:
1. Add water until moist and mix thoroughly.
2. Add more greens or organic fertilizer or manure and mix thoroughly.
Composting Systems - continued

9. Vermicomposting (Composting With Worms)
Vermicomposting is a process of using worms to produce rich compost from kitchen wastes.
Vermicomposting is a good alternative if you live in an aprtment or if you generate mostly food scraps.
The best diet for your worms are food scraps that are of plant origin.
This includes vegwetables and fruit trimmings, coffee graounds, bread, cereal, tea bahgs and other paper products.
Animal products such as meat, eggs, cheese, etc are discouraged or best kept to a minimum to prevent odour.
Making A Worm Bin
Materials
- Plastic or stryrofoam containers with lid
- Window screen
- Duct tape
- Newspaper, shredded paper or paper-board
- Water
- A hand-full of sand or soil
- Electric drill with 1 inch spade bit
- 1/2 - 1 kg worms (2,000 - 4,000 worms)
Commercial worms that are commonly used for vermicomposting are Tiger Worms (Eisenia foetida), Malaysian Blueworm (Perionyx excavatus) and African Nightcrawlers (Eudritus eugeniae).
Worm Bin Construction
1. Drill holes either on the top or sides of container.
2. Drill at the bottom of the bin to ensure good drainage of "compost tea". a nutrient rich liquid which is a by-product of the decomposition process.
3. Collect this liquid to use as a foliar fertilizer or used as normal fertilizer.
4. Cut small pieces of screen to cover the holes and tape them to the inside of the bin using duct tape. This is to ensure that other vermins such as cockroaches, ants and other inscests do not enter the bin.

Bedding
1. Bedding is a very important aspect of vermicomposting.
2. Make the bedding by shredding paper lengthwise into 1 inch strips to fill the bin 1/3 full.
3. Spread sand or soil over the bedding.
4. Pour water over the newspaper strips; stirring the bedding as you moisten it.
5. Dump worms out of containers onto surface of the bedding.
Caring For The Worms
1. DFeeding: 1 kg of worms can process 1/2 kg of kitchen scraps a day. Feed them daily, weekly or as desired.
2. Cutting kitchen scraps into small pieces allows the worms to consume them faster.
3. Bury the scraps under the bedding; rotate where you bury them. You may add more bedding every once in a while.
4. Temperature: The ideal temperature for worms is between 15 - 26 C (60 - 80 F). Therefore, place the bin in a shady area but not under direct sunlight.
5. Moisture: Check the moisture when adding kitchen scraps. If too wet, add more bedding; if too dry, add water. Worms like moisture.
6. Darkness: Keep the lid on your bin. Worms do not like light and the colsed bin will not attract flies.
Harvesting
After 2 - 3 months, the worms will have digested the bedding and food scraps into a rich, dark compost. Thre are two ways to harvest it:
1. a. Push the compost to one side of the bin and fill the empty side with
moistened, shredded newspaper.
b. Place kitche scraps into bedding.
c. The worms will eventually leave the compost and migrate towards the food.
d. The compost can then be removed.
2. a. To harvest both the worms and the compost at the sme time, empty the contents
of the bin into a pieces of plastic sheet.
b. Allow the worms time to retreat to the middle of the pile away from the light,
then scrape off the outer layer of compost.
c. Repeat this process untill all the compost is harvested and mostly worms are
left.

Composting Systems - Continued

7. Windrow Composting
Materials
- Small branches or twigs
- Hollow blocks
- Hollow tube with hole (plastic or bamboo)
- Gunny sacks
- Kitchen waste
- Sawdust or wood chips
- Water
- Shovel
Method
1. prepare "batas" windrow by laying the hollow blocks in rectangular shape.
2. Prepare heaps by laying waste material into the "batas".
3. Make a 10 inches depression inside the heap to prevent water/leachate from escaping. This is to avoid unpleasant odours while composting, especially dureing the rainy season.
4. Put the shredded biodegradable waste inside the compost heap.
5. Cover with soil, at least 3inches thick.
6. Top with sawdust (available from lumber yards) to absorb excess moisture.
7. Cover the compost heap with gunny sacks that have been sewn together. The sacks will maintain heat for faster decomposition of waste.
8. Insert plastic tubes (3 inches diameter) or bamboo tubes to release methane gas and for oxygen.
9. Leap heap covered for 45 - 60 days. then harvest.

8. Bottomless Bin Composting
Materials
- Empty bin or suitable container with cover
- Kitchen and garden waste
- Soil
- Water
- Shovel
Method
1. Remove the bottom of your bin or container.
2. Drill holes in bin or container for aeration.
3. Turn the bin or container upside down and place it in a well-drained position.
4. Lay the bottom with 7 - 8 inches of browns comprising of dried leaves or garden materials.
5. Add kitchen waste to top for 3 consecutive days, then cover with a thin layer of soil or dry grass.
6. Keep adding until bin is full. Cover the bin. If your compost heap is too dry, then sprinkle some water to keep it moist.
7. After 1 - 2 weeks, remove the bin jacket and turn the compost either back to the same bin or a 50 - 70 kg sugar sack to store the compost.
8. Turn the compost 3 - 4 times and leave it to mature for 3 - 4 months.
Monday, April 28, 2008
Composting Systems

1. Plastic Bag Composting
Materials
- Empty plastic bags/sacks
- Soil
- Browns (dried leaves, twigs, paper, etc)
- Hooks
- Kitchen waste
Method
1. Punch holes in plastic bags to provide adequate aeration.
2. Put a layer of soil at the bottom of the bag.
3. Alternate your kitchen waste with browns until the plastic bag/sack is full and move on to the next one.
4. Plastic bags may be tied up and hung with hooks on fences or stacked up neatly.
5. Remember to keep the contents moist at all times.
6. Compost can be ready for use in 4- 5 weeks' time.

2. Flower Pot Composting
Materials
- Empty flower pots
- Kitchen waaste
- Soil - 1 pot
- Water
- Shovel
Method
1. Lay a layer of gravel or stones at the bottom of the pot for aeration.
2. Put a layer of soil (about 2 inches) on top of this.
3. Put in the biodegradable waste, and dry leaves (if available).
4. Cover loosely with a layer of soil.
5. All holes and crevices should be covered with soil to avoid vermin and animals such as flies, cockroaches, cats and dogs from digging up the food. Covering with soil also prevents odour.
6. The amount of soil should be proportional to the volume of waste (about 20% soil).
7. Do this everyday until the pot is full. Use the next flower pot when the first one is full.
8. Your compost should be ready in 4 - 5 weeks' time, and can be used as fertilizer for plants, trees or lawn.
9. You can use the pot again to bury your waste or use a new pot.
10.Pots may be stacked on top of each other, but the contents must be kept moist at all times.

3. Tower Tyre Composting
Materials
- Old tyres
- Kitchen waste
- Soil
- Water
- Shovel
Method
1. Make two or three piles of old car tyres (4 - 5 tyres stacked up for a pile) directly on the ground, and use them as a container for composting.
2. To aerate, just insert anything (a stone, piece of wood, etc) in between the tyres.
3. If placed directly on cemented ground, line the bottom with soil first.
4. Alternatively, old drums, water containers without bottoms, or even rice sacks (supported by 3 pegs) with bottom ripped open can be used.
5. Use the method as in flower pot composting above.

4. Compost Pits
Materials
- Small branches or twigs
- Hollow tube with holes (plastic or bamboo)
- Kitchen waste or food scraps
- Soil
- Water
- Shovel
Method
1. Dig two pits 2ft x 2 ft x 2ft. The pits should be situated in a place exposed to sun and air.
2. Put small twigs at the bottom and place a hollow tube for air circulation.
3. Place the kitchen waste (vegetables, fruit trimmings and peelings, leftover food, etc) into the pit and cover with sufficient soil to ensure that no odour emanates from the pit.
4. If a single fly is seen hovering around the pit, add more soil to cover the kitchen waste.
5. Do not compact the soil but allow it to loosely cover the contents of the pit and ensure tha the soil adequately covers the kitchen waste.
6. Keep compost pit moist and moderately wet.
7. Repeat the process until the pit is full.
8. During heavy rain, cover the pit with a piece of wood or plastic to prevent too much water from entering the pit.
9. Use the second pit while waiting for the biodegradable waste in the first pit to fully decompose.
10.Decomposition usually takes 3 - 4 weeks for small pits, and 3 - 4 months for big pits.
11.To test if the compost is ready, scoop a little portion from the pit and if no foul odour emanates from it, then decomposition is complete.

5. Wire Hoop Composting
Materials
- 10ft x 3ft piece of heavy-duty wire mesh fencing
- 4 pieces of wire or other easy-to-twist wire
- Graden waste
- water
- Shovel
Method
1. This system is suitable for yard or garden trimmings only.
2. Chop them into smaller pieces if you wish to ensure faster decomposition.
3. Form the wire mesh into cylinderical form and tie up the ends with 4 pieces if wire.
4. For best results, install a location that is protected from the wind, and where there is enough space to turn the compost easily ( about 3ft x 6ft).
5. Add in garden material (browns and greens) in alternate layers until heap is full.
6. Compost can be turned by unfastening th hoop, setting it up in an adjacent spot, then forking the compost into the hoop in its new location.
7. Maintain compost by keeping it as moist as a wrung-out sponge.
8. Harvest rich brown compost from the bottom and the center of the pile after 12 - 18 months.

6. Heap Composting
Materials
- Garden waste
- Water
- Shovel
Method
1. Choose a designated location in your garden.
2. Pile garden waste in a heap and water once every week if weather is dry.
3. Turn the compost pile over after 4 - 5 months.
4. The compost can be harvested after 11 - 12 months.
Saturday, April 26, 2008
Pioneer Composting Project at SMK Agama, Sibu
On 21.04.2008 we started a Pilot Composting Project at SMK Agama, Sibu. It was actively participated by caring teachers and students. We supplied raw materials like loadful of gravel and earth, hollow blocks, barrows, spades, cangkol, etc. We used CMS 100 Shredder to chip tree branches and leaves into browns and the school kitchen provides sufficient greens for use. We even managed to acquire bio-booster from Life Technology for eradicating the awful odour and accelerating the decomposition process. If all go well, we expect to harvest mature compost in 5 or 6 weeks. Photographs below are relevant and indicative.

Laying the hollow blocks

Levelling layers of browns and greens alteratively

Adding bio-booster to eradicate awful odour & accelerating process

we selected this site


Laying the hollow blocks

Levelling layers of browns and greens alteratively

Adding bio-booster to eradicate awful odour & accelerating process

we selected this site

Wednesday, April 23, 2008
Garden Waste Composting Demonstration At Taman Li Hua,Sibu

Talk on Composting in progress

Wooden composting chamber made by the residents
Here come the day(06.04.2008) choosen by the Chairman of Taman Li Hua, Sibu, Mr. Tiong Tung Uh for a demo of the garden waste composting at the garden itself. More than 50 local residents of Taman Li Hua came for the basic composting talk and they actually witnessed the demonstration on setting up a wooden composting chamber in the garden.
KTS also participated in the demonstration of the proper operation and usage of shredder machine GB370 for the crushing tree branches into small pieces for use as brown in the process.
We appreciate the public and the business partner to make our composting project a success !
Monday, April 21, 2008
How We Started The Neighbourhood Garden Composting Project In Sibu.

After coming back to Sibu Municipal Council,Sibu on 1st February 2008, my 1st official job assignment was to take charge of Household Composting Project for Sibu.
After going through the ground work survey and consultation with my superior and colleagues, a meeting was called and headed by Cr. Abang Iskandar Bin Abang Latip as the Project Chairman.
Other project committee members are :- Mr. Yong Ing Chu , Assistant Secretary of SMC, Mr. Chiang Kee Siong, Chairman of Taman Grand Height,Sibu; Mr. Tiong Tung Uh, Chairman of Taman Li Hua, Sibu; PPKP Peter Chong, PPKP Mike Ho, PPKP Pius Henry,Miss Angela Swin,Landscape Architect of SMC and PPKP John Tang.
The meeting decided to start the project for Taman Li Hua (Perpaduan) and Taman Grand Height, Sibu. From here on, more exciting events are to come.......
How I Started My Backyard House Composting

I started my backyard composting at the end of November, 2007 after my official retirement.
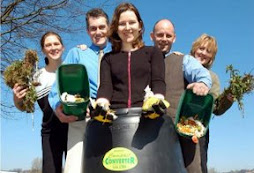
The 1st Household Composting Seminar organised by SMC gave me the tips and basic knowledge of composting. Without fear and favour, single-handed I made the compost site by constructing one compartment with blocks of bricks, placed gravels as base, filled in a layer of earth/soil, followed by adding the garden debris, pieces of woods, leaves and branches from the backyard. The branches and woods were chopped into smaller pieces and mixed well, sprayed with water and covered them with another layer of earth/soil . As days went by, after 6 weeks, some mature compost were heavested as shown in the above photograph. My wife, daughter and friends rejoiced with me to see the result. I hope all my friends out there and you can start composting in your backyard too.
Wednesday, April 16, 2008
1st Household Composting Seminer On 02.11.2007

The 1st Household Composting Seminar for Sibu was organised by Sibu Municipal Council,Sibu on 2 November 2007 at RH Hotel, Sibu and attended by 120 participants comprised of members of various NGOs. Mr. Khor Hung Teik, Sr. Research Analyst of Socio-Economic & Environmental Research Institute, Penang gave the talk and demonstated the proper methods of Household composting for the participants.
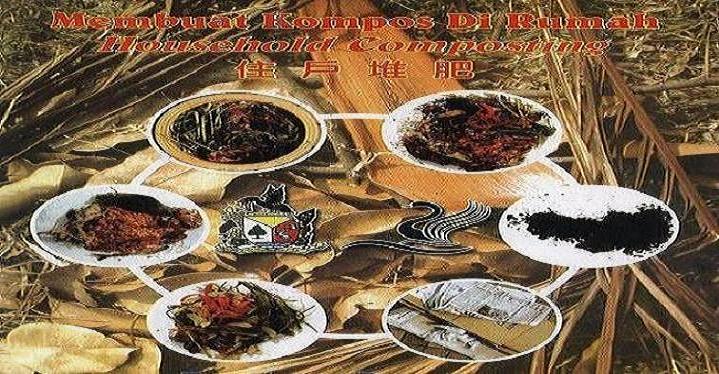
What Is Composting?什么是堆肥?
Composting is nature's way of recycling organic matter.
堆肥是天然的再循环有机物质.
It is the process whereby bio-degradable organic matter is broken down by micro-organisms in the presence of oxygen.
这种过程是由生物降解的有机物质在氧气的影响下被微生物分解.
The product of this process is compost, which benefits the environment as a natural fertilizer for gardening and farming.
这项过程生产出堆肥, 它是园艺和农耕的一种天然肥料, 对环境有益无害.


Benefits of Composting堆肥的益处
Composting has many benefits. Some of the most important are:
堆肥拥有多种益处,其中最重要的是:


堆肥拥有多种益处,其中最重要的是:
- Nenefits the environment by recycling valuable organic resources
再循环珍贵的有机资源,对环境有益
2. Saves money on fertilizer for plants
节省购买种植所需的肥料
3. Acts as an excellent soil conditioner and adds on to soil volume
扮演优越的土壤调剂品及增加土壤的容量
4. Saves water by retaining moisture in the soil
保持土壤的潮湿, 节省水的用量
If you don't have a garden or live in a highrise building, you can still make compost and use it on houseplants, give it to a friend or use it in a community garden.
如果您的家没有花园或是住在高楼, 您也可制作堆肥和把它用在屋内植物中, 送给朋友或把它放在公园内。


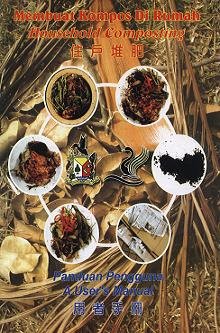
Composition of Biodegradable Materials
Compostion of Biodegradable Materials
Type
Kitchen Waste
These include:
- Fruit and vegetable wastes - skins, peels, seeds, leaves, roots, com cobs, etc.
- Entails, innards
- Meat and diary products, egg shells
- Leftover food - rice, curries, prawn shells, bones and other leftover cooked food,
etc.
- Tea bags, coffee grounds
Garden or Yard Waste
- Grass clippings
- Leaves
- Weeds
- Dry leaves
- Woody materials (twigs and branches)
- Straw
- Saw dust
- Soil
Newspaer and Cardboard
- Paper towels
- Toilet paper
- Tissue paper
- Cardboard boxes
Other Household Items
- Disposable diapers (plastic liner removed)
- Sanitary napkins (plastic liner removed)
Air is essential for decomposition microorganisms to live and multiphy.
Water provides moisture for decomposer organisms.
In building a compost pile, you are actually building a home for these microorganisms.
Turning and watering the compost heap provides it with air and water that are essential for decomposer microorganisms.
Another ingredient that is often used is soil, which is a source of microorganisms that aids in the decomposition process.
The main decomposer microorganisms are bacteria, fungi, worms and insects.
Kithcen and food scraps can also be incorporated in some methods of composting.
mature compost exudes an earthy smell. is often dark brown or black in colour and feelsm crumbly and sightly moist.
The finer the materials used for composting, the faster it will mature.
Composting for organic farming is the same as discussed above but does not include paper products (tissue paper, paper towels, soiled diapers, cardboard, etc) as these have been treated with chemiclas during the manufacturing process.
Tuesday, April 15, 2008
PREFACE -SIBU HOUSEHOLD COMPOSTING PROJECT

Dear residents of Sibu,
Welcome to Sibu Household Composting Project(SHCP) blog.
This page is created solely for the promotion of Household Composting for the benefit of all the residents of Sibu participating in Household Composting as a healthy life style.
欢迎各位亲爱的同胞,此部落客是专为您而设, 旨在推广及鼓励市民积极参与住户堆肥计划。
Organic waste forms a major part of the daily waste stream generated by households. The mixture of organic waste with other recyclable items such as newspapers, aluminium cans, plastics and bottles make it hard for such discarded resources to be efficently recovered.
有机废料在住户们每天所丢弃的废料中占有主要的成份。
有机废料如参与其他再循环物品如报纸, 铝制罐子, 塑胶料和瓶子, 将使这些丢弃的资源很难有效的回收。
Since households generates a lot of material, the separation of organic waste material at source should be encouraged.
家居住户制造很多有机废料, 因此人们必须受鼓励从这些丢弃的废料中把有机废料分隔出来。
Thank you for your active participation and wish you sucess!
衷心感谢您的参与并祝您成功!
Subscribe to:
Posts (Atom)


